
The
VIEW OUR TRAVEL PHOTO ALBUM >
July 27, 2015
Get Out Of Auto! [ Focus Points ]
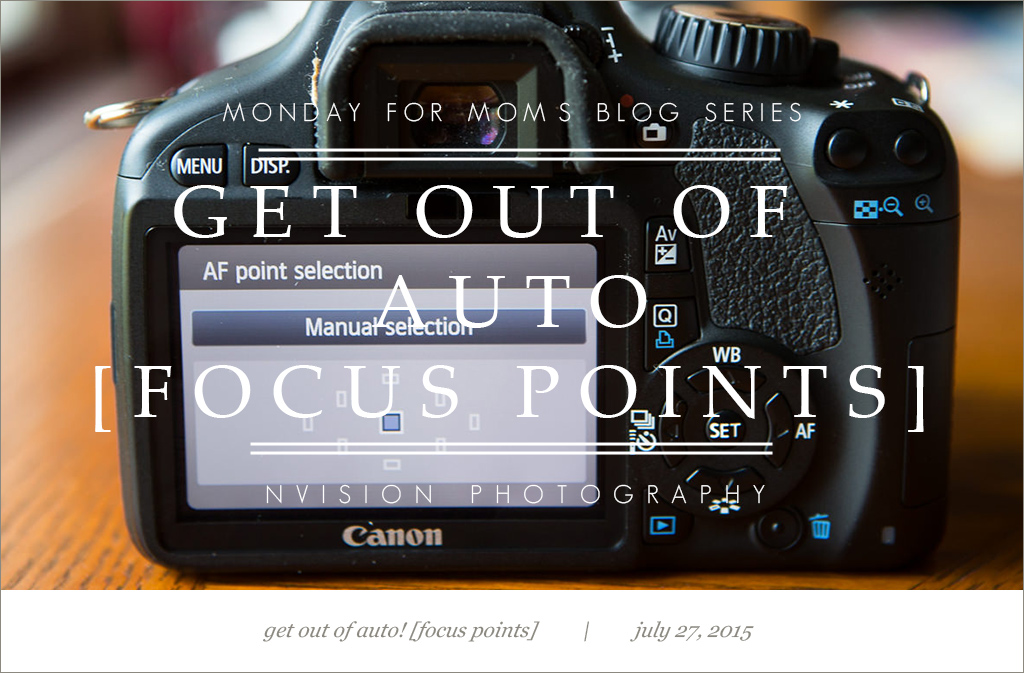
[part of the Monday for Moms blog series – small tips and tricks that will make big changes in photos of your children]
So, you got a shiny new DSLR camera and a few lenses. Are you amazed at the difference from your phone or old point and shoot? Maybe, maybe not. Often times, we can notice a difference and are very pleased in our purchase, but we don’t quite use it to the fullest extent. This post is for all of those who are still using “Auto” for most of your camera settings. Sure, many DSLRs are decent at guessing your intention when snapping a picture, BUT, that is all that they are doing. Guessing. Wouldn’t you rather have that control – the ability to tell your camera exactly what you want it to do? Now, we’re going to take this one baby step at a time and today just barely dip our toes in the water.
Most lenses can be focused either automatically (by the camera) or manually (by you). Today, we’re sticking with automatic focus, which is what I use 95% of the time because it is typically very accurate. This control is usually located on the lens itself and is a little switch labeled “AF” & “MF”. (Just a tip, if you ever think that you’ve broken your camera because it won’t focus, you may have just accidentally switched this to “MF”.)
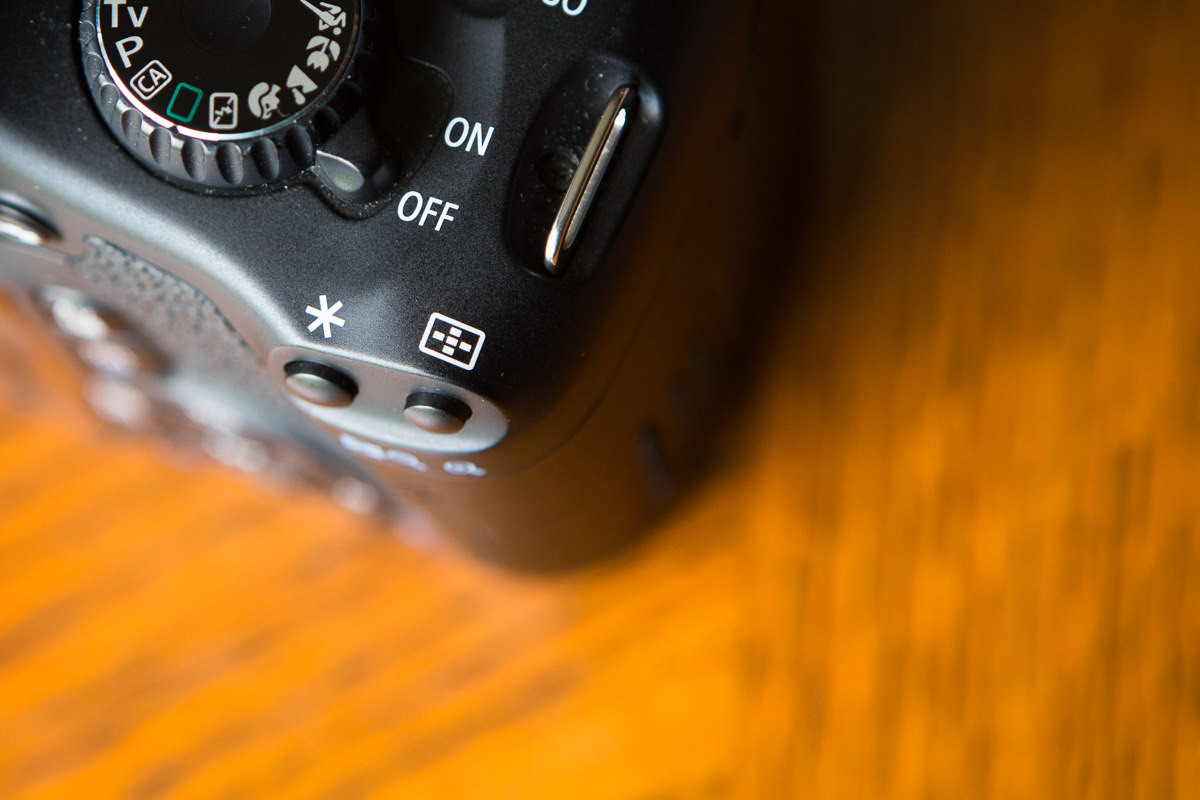
When using autofocus, the camera can choose where to focus, or you may select where to focus by using a focal point. Often times, this control is on the back of the camera and is a button that looks something like this “t” shaped button (the Astrix button beside this is the button I use for back button focus):
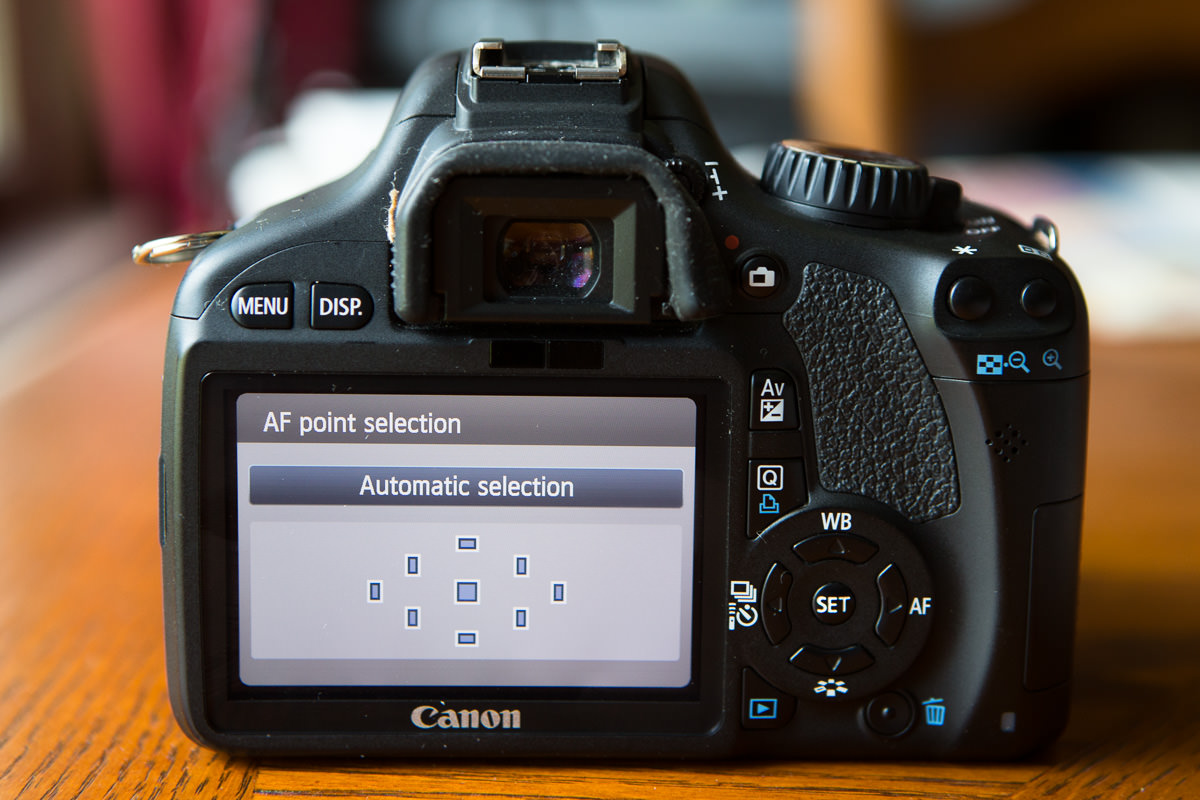
When selected, a menu like this opens. You can choose any of these points. You can also see this menu from within the view finder (the eye piece – I recommend you do this!). When automatic selection is enabled, all focal points are selected. When using manual selection, you choose any single point.
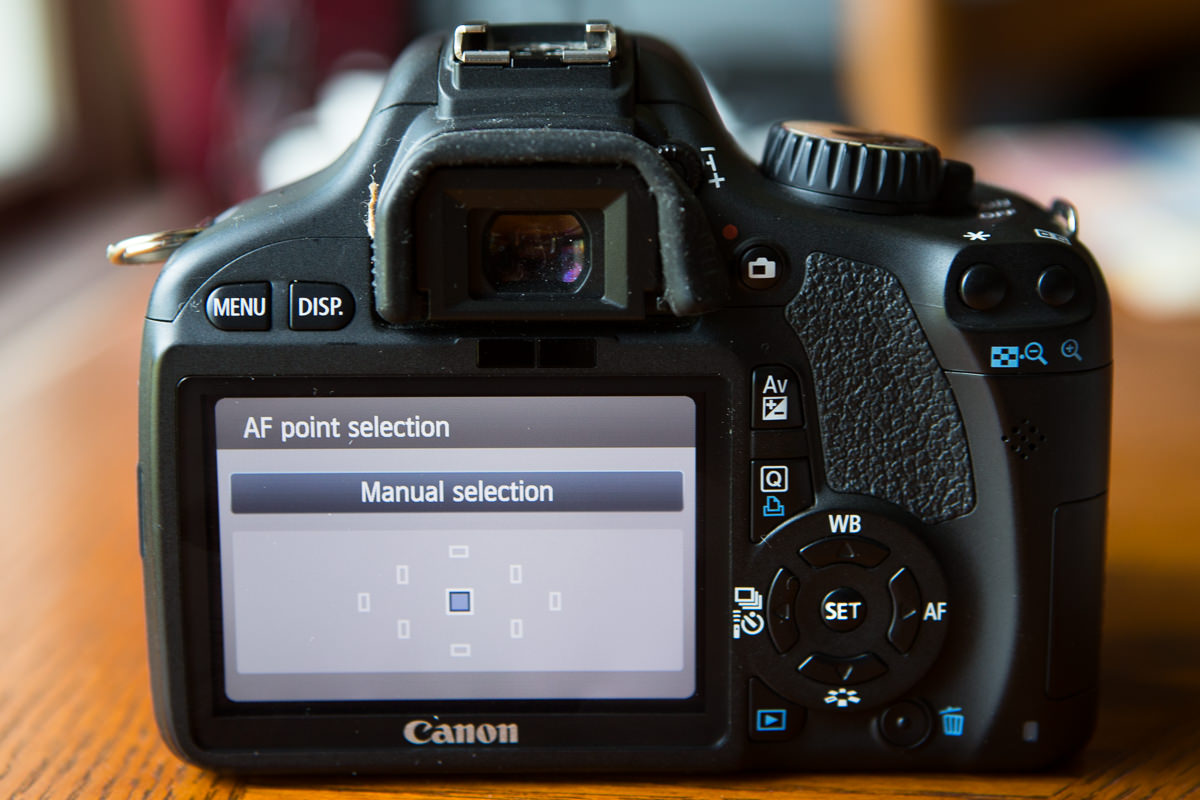
On many DSLR models, the center focal point is the strongest because it is cross type. I usually keep my center focal point selected and use back button focus (BBF see this post for more info) to lock focus on my subject – specifically, the eye that is closest to the camera. I then release the BBF, shift just my camera to place the subject where I’d like within the frame, and finally release the shutter. When reframing my subject, I’m careful not to shift my body, move the height of my camera, or adjust the zoom of the lens. Any of these things will mess up focus of my image. By carefully reframing my subject, I can maintain focus but still frame the subject the way I’d like. This is how I acheive photos with a lot of negative space (off centered subjects).

Another option is to toggle focus points. Choose a focal point that aligns with your subject, focus, and snap, simple as that! This method is limited by the number of focal points your camera actually has, so I choose to focus and reframe so that I have more options. It also takes me more time to toggle focus points than to focus and reframe. Really, the way you choose will vary based on personal preference and the number of focal points on your camera model. Either way, get out of auto and tell your camera what you want it to do. Use manual focus points!
Questions? Comments? Have a topic you’d like me to put in the Monday for Moms lineup? I love to hear from you! Use the comment box below.
– Nikki

0
comments